

Hi All!
A little over a month ago I decided to take a leap of faith and go back to school. I've been out for a "while" now so it was a huge, nerve wracking decision for me to make. With an awesome, supportive husband and family I jumped in with both feet. I'm so glad I did! I have enjoyed these summer classes so much. They have been challenging but I feel great knowing that I am working towards a "greater good" for our family.
The last month or so I have been so busy and up late nights studying, writing essays, memorizing bones and muscles and reading, reading, reading. Since I have never had a desk of my own I started out at the kitchen table doing my schoolwork. With two littles at home that constantly want to color and tear the pages out of my books and spill milk on my computer know if they can help me do homework, my time there was short lived. I knew I needed to be able to get away, where I'd have a little peace and quiet.
My next stop was my bedroom vanity. That worked great for a few weeks. It is an awesome, mint colored, vintage dry-sink that I scored a year or so ago at a local antique store. I love it! I was able to set up there, lock myself in the bedroom and get quite a lot accomplished. But it is only about three and a half feet wide and my computer and small printer took up the entire surface. I had books, papers and folders spread out all around me on the floor. And I couldn't scoot my chair up to it like a desk because there was nowhere for my legs to go. It got sort of uncomfortable sitting there after a while. Not cool.

As the weeks progressed and I had more homework to do, I got more and more frustrated at my lack of space and the disorganized mess that I had accumulated. One night, as I was drooling over all the gorgeous DIY projects on +Shanty2Chic's website, I searched the word "desk" and LOVED what I saw. Whitney, half of the creative genious behind Shanty-2-Chic, was in a similar situation as I was. She lost her blogging area when her fifth child came along, so she needed a new blogging desk that would fit in her bedroom. What she came up with was so beautiful, the perfect size for my space and just what I was looking for! She worked with an amazing DIY momma from Alaska, +Ana White, to create the plans for her farmhouse style desk. Ana and her husband built their home from scratch, all by themselves, and out of necessity, Ana starting building furniture for her home too. Whitney asked her to come up with plans for a desk and the outcome was wonderful! Ana's desk plans were really easy to understand. I showed them to my husband and we decided to give it a shot. We had never built anything like this from scratch before so we were excited and nervous to give it a shot.
With the desk plans and shopping list from Ana's blog in hand, we went to Menards and purchased everything we needed.
{{I must say that we had some pretty cute little helpers too!}}
With the desk plans and shopping list from Ana's blog in hand, we went to Menards and purchased everything we needed.
{{I must say that we had some pretty cute little helpers too!}}
 |
| DIY Diva In Training |

"I'm here to look cute!"

Once we got all our lumber home, we took out the cut list from Ana's site and started cutting all the pieces according to her measurements. As my husband finished cutting I sanded all the rough edges.
Here's the beginning of our cut lumber pile. Notice my little Ryobi sander? It is perfect for projects like this!

I love that it is small and cordless so I don't have to worry about finding a place to plug it in when I am working in the backyard. I also love that it doesn't vibrate my hand do death like some sanders do. And the little sanding papers are attached with velcro so they are so easy to replace when they get worn down. The pointed front edge of the sander is perfect to sand more detailed pieces too! And like all my other Ryobi power tools the batteries are interchangeable so I didn't have to worry about having a battery for each one. I only own two! When one runs out I put it on the charger and use the other and just flip flop them.
Easy peasy!

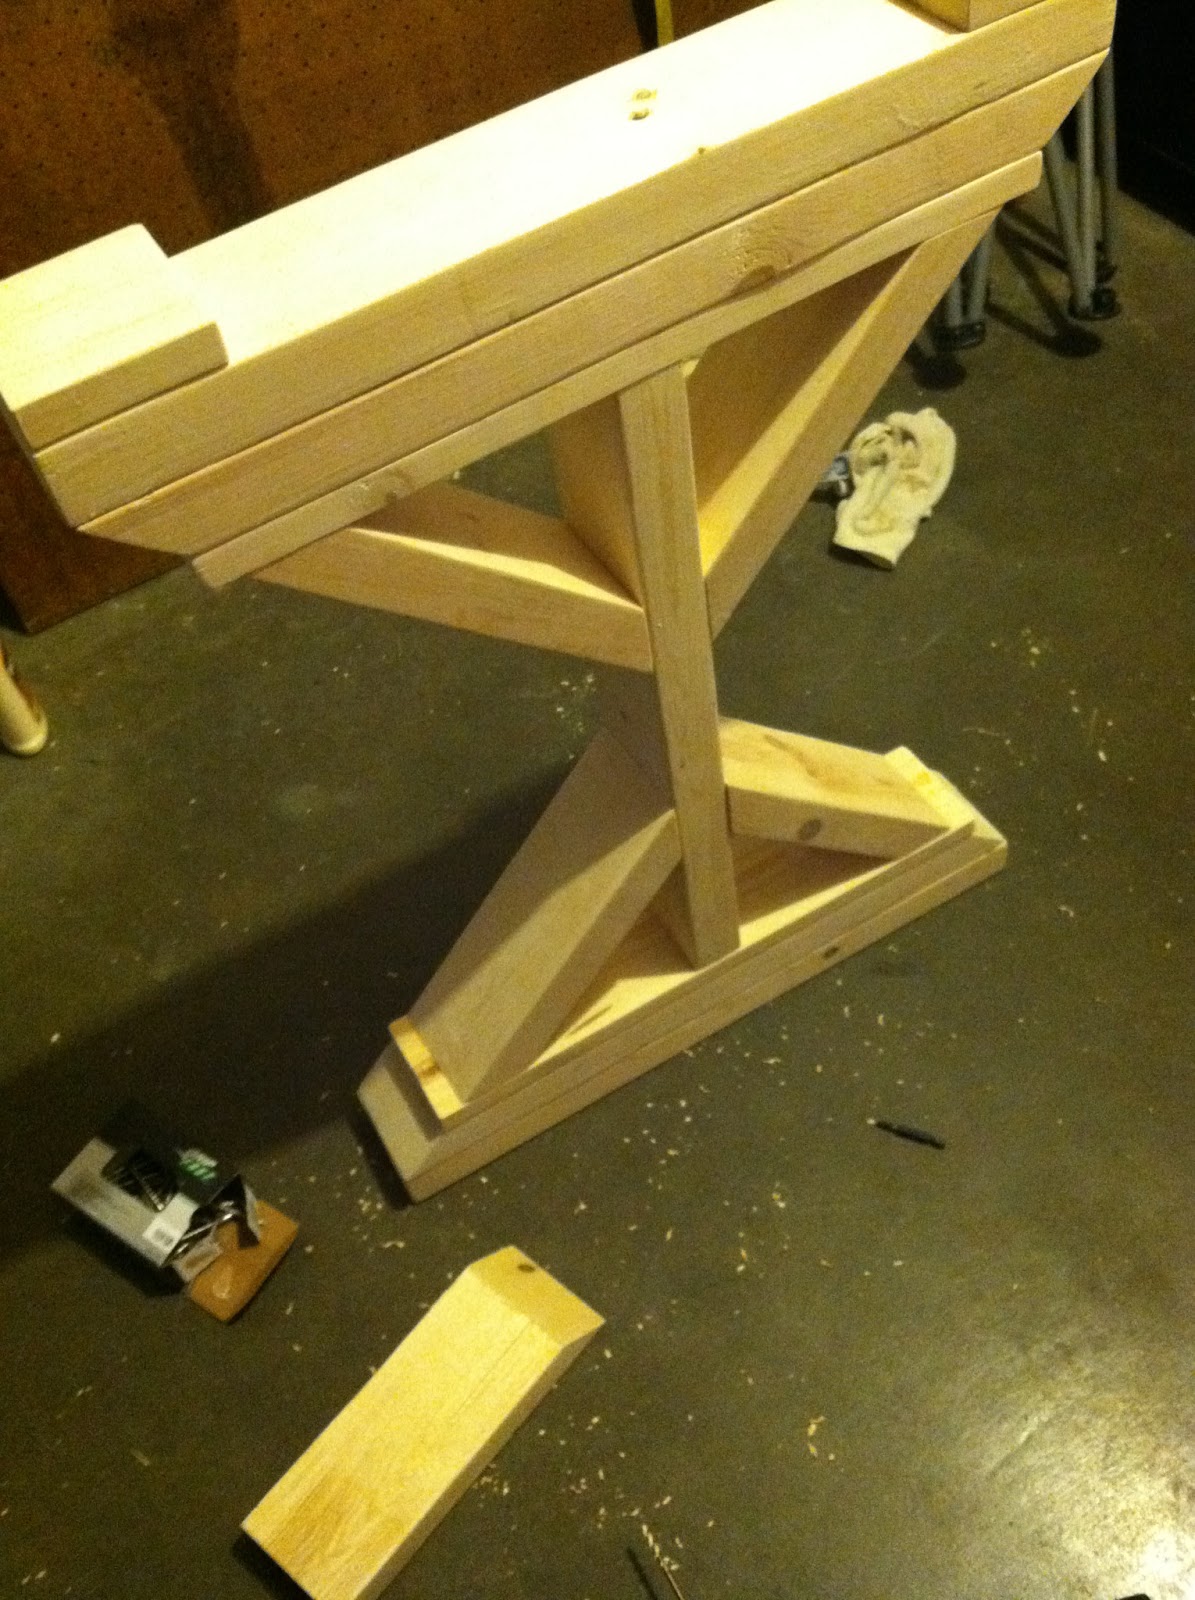
When we had everything cut and sanded we started piecing together the legs, following Ana's instructions. We put a small amount of Elmer's wood glue on each piece before we screwed them together.


Here are the screws we used to piece everything together. They are a 2 1/2" finish screw. We found these at Ace Hardware but they are available many places.
Here are the legs up-side-down after we attached the feet. Aren't these little darlin's so cute?!


Once we had the legs together I stained everything with my favorite wood stain from Varathane. It is called "Early American". It is the perfect shade of medium-brown with no red or orange undertones. You can get it at Menards, near the paint section.

I love this stain because it is a gel, so it is not as messy to work with as liquid stain. The directions say to squeeze some out and apply it with a lint free cloth but I have found if I squeeze a quarter size amount out and use an angled paintbrush to work it into the wood in the direction of the wood grain (especially into the nooks and crannies of these desk legs) and follow it with the rag it works a lot better. And you will use less stain that way because more is getting on the wood and not just soaking into your rag.
Once everything was stained, we let it dry overnight.
We came back the next day and put the top of the desk on the legs. The top is made from two 2 x 12s. We screwed them on with finish screws. I didn't bother to fill the screw holes. I love that they add a little to the rustic look, along with the natural knots in the lumber.
We came back the next day and put the top of the desk on the legs. The top is made from two 2 x 12s. We screwed them on with finish screws. I didn't bother to fill the screw holes. I love that they add a little to the rustic look, along with the natural knots in the lumber.
Once we had the top of the desk attached, I sprayed the whole thing with clear, satin finish polyurethane. I don't remember what kind I used. I think any kind would be fine.
After a few accessories from Target, TJ Maxx and Hobby Lobby it was complete.
And there you have it!!
And there you have it!!


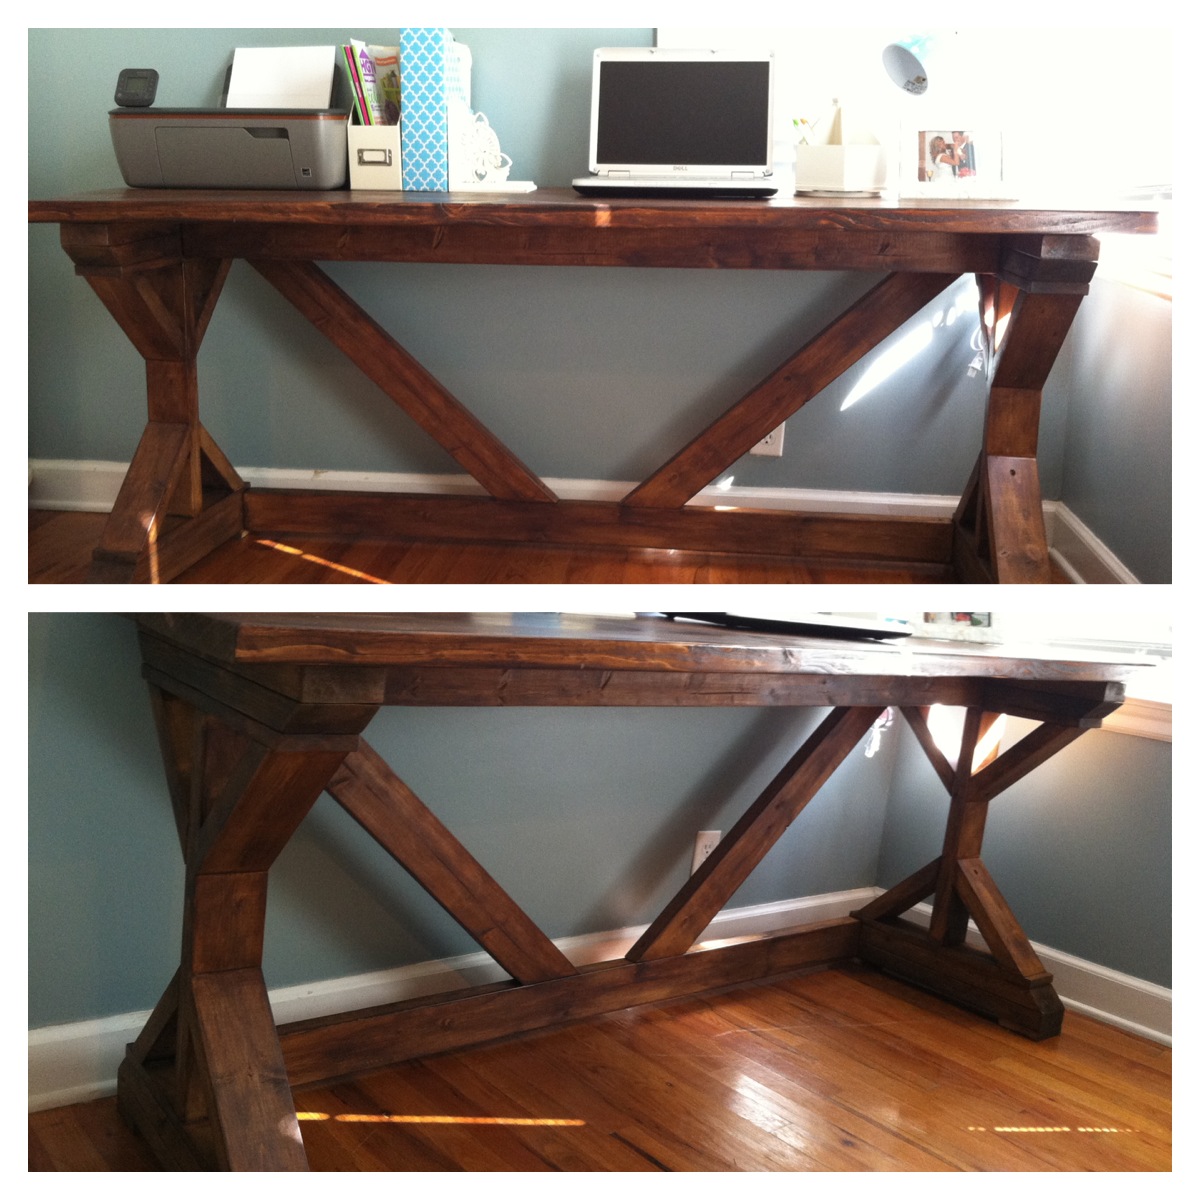

 Didn't it turn out great?!?! I am so excited to have a space to study, do homework and blog! I've never had a desk of my own so this is like a dream come true. It fits perfectly in a little nook in our bedroom so it is like my own little oasis. Notice the two corner windows? They let in such beautiful sunlight and go out to our backyard so I can sit and work and watch my sweet kiddos swinging or playing with the dog. I'm so proud of my husband and I. I think we make a pretty great team!
What do you think? I'd love to hear from you. Have you ever built anything from scratch? Do you have any "go-to" products that you would suggest? I love to try new things!
Until later... Have a lovely day!
No comments:
Post a Comment